Welcome to your Drill Press Manual. This guide provides essential information on safe operation, proper setup, and maintenance. Read carefully to ensure optimal performance and longevity of your tool.
1.1 Purpose of the Manual
This manual serves as a comprehensive guide for the safe and efficient operation of your drill press. It covers setup procedures, maintenance routines, and troubleshooting tips to ensure optimal performance and longevity. The manual is designed to help users understand the machine’s components, select the right tools, and apply best practices for various drilling tasks. By adhering to the guidelines, users can achieve precise results while maintaining a safe working environment.
1.2 Importance of Reading the Manual
Reading this manual is crucial for understanding proper setup, operation, and maintenance of your drill press. It provides critical safety guidelines, helping you avoid accidents and ensure safe working practices. The manual also explains how to select the right tools and materials, preventing damage to the machine or workpiece. By following the instructions, you can optimize performance, troubleshoot common issues, and extend the lifespan of your drill press. Always refer to this guide before starting any project.
Safety Precautions and Guidelines
Safety is paramount when operating a drill press. Always follow guidelines to prevent accidents, ensuring a secure workspace and proper use of protective equipment for optimal safety.
2.1 General Safety Rules
Always follow safety guidelines to ensure safe operation of the drill press. Read the manual thoroughly before use, wear protective gear like safety glasses and gloves, and secure the workpiece firmly. Avoid loose clothing or jewelry that could catch in moving parts. Keep children and bystanders away from the workspace. Never operate the tool when tired or under the influence of substances. Ensure proper ventilation and avoid overreaching. Regularly inspect the machine for damage or wear. Stay alert and use common sense to prevent accidents.
2.2 Personal Protective Equipment
Always wear safety glasses or goggles to protect your eyes from flying debris. Wear gloves to improve grip and prevent hand injuries. Avoid loose clothing or jewelry that could get caught in moving parts. Ensure all PPE is in good condition and easily accessible before starting work. These precautions minimize risks and ensure a safer working environment when operating the drill press.
2.3 Workspace Preparation
Ensure the workspace is clean and clear of clutter to prevent accidents. Secure the drill press on a stable, level surface to maintain accuracy and safety. Proper lighting is essential for visibility. Clamp the workpiece firmly before drilling to avoid movement. Keep loose clothing and long hair tied back. Maintain a safe distance from children and bystanders while operating the drill press. A well-prepared workspace reduces risks and enhances efficiency during drilling operations.
Understanding Drill Press Components
This section introduces the key parts of a drill press, including the spindle, chuck, and arbor, essential for precise drilling operations. Familiarize yourself with each component to ensure proper usage and maintenance.
3.1 Major Parts of the Drill Press
The drill press consists of a base, column, spindle, motor, and feed mechanism. The base provides stability, while the column houses the spindle assembly. The motor powers the spindle, which holds the drill bit via the chuck. The feed mechanism allows precise control over drilling depth. Understanding these components is crucial for safe and effective operation.
3.2 Drill Chuck and Key
The drill chuck securely holds the drill bit in place, ensuring accurate drilling. It is typically a 3-jaw or 4-jaw chuck, with jaws that tighten around the bit. The drill key is used to tighten or loosen the chuck. Proper use of the key ensures the bit is held firmly, preventing slippage during operation. Always ensure the chuck is tightly secured before drilling to maintain safety and precision.
3.3 Spindle and Arbor
The spindle is the rotating component that holds the drill bit, while the arbor connects the spindle to the chuck. Together, they ensure precise rotation and alignment. Proper alignment is crucial for accurate drilling. Always ensure the arbor is securely attached to prevent wobbling or damage. Regularly inspect and maintain these parts to ensure smooth operation and extend the tool’s lifespan. Misalignment can lead to uneven drilling or equipment damage, so handle with care.

Assembly and Installation
Follow the step-by-step guide to assemble and install your drill press correctly. Ensure all parts are included and securely fastened. Mount the machine on a stable surface for optimal performance and safety;
4.1 Unpacking and Inventory
Begin by carefully unpacking the drill press and verifying all components against the provided inventory list. Ensure the machine, drill chuck, arbor, and accessories are included. Inspect each part for damage or defects. Organize the components to avoid misplacement during assembly. Refer to the manual for a detailed list of included items. If any parts are missing or damaged, contact the manufacturer immediately. Proper inventory ensures a smooth assembly process and prevents delays. Take your time to ensure accuracy and completeness.
4.2 Step-by-Step Assembly
Begin by assembling the drill press on a clean, stable work surface. Attach the table to the column using the provided bolts, ensuring alignment. Next, install the spindle and chuck assembly, following the manual’s instructions. Secure the arbor in place and tighten all connections firmly. Use the provided wrench to ensure proper torque specifications. Double-check all alignments and connections before proceeding. Refer to the Owner’s Manual for detailed diagrams and specific assembly instructions tailored to your model.
4.3 Mounting the Drill Press
Mounting the drill press securely ensures stability and accuracy. Place the machine on a sturdy, flat surface and use anchor bolts to fasten it to the floor or workbench. Ensure the surface is level using a spirit level. Tighten all mounting bolts firmly to prevent vibration and movement during operation. Always follow the manufacturer’s guidelines for proper installation to guarantee optimal performance and safety. A well-mounted drill press reduces the risk of accidents and improves drilling precision.
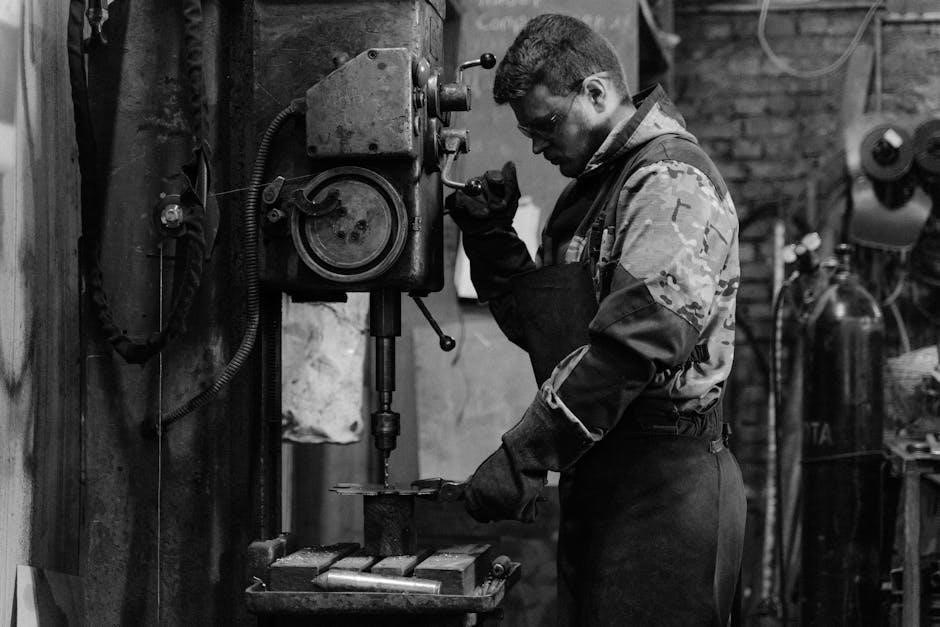
Operating the Drill Press
Ensure the workpiece is securely clamped. Select the correct drill bit and adjust spindle speed according to material thickness. Start drilling slowly, applying steady pressure downward.
5.1 Setting Up the Workpiece
Ensure the workpiece is properly clamped or secured to the drill press table using clamps or a vise. Verify alignment with the drill bit tip. Check that the material is flat and stable to prevent vibration. Use a fence or guide for consistent results. Always wear safety goggles and keep loose clothing tied back. Double-check the setup before turning on the machine to avoid accidents. Proper alignment ensures accurate drilling and prevents damage to the tool or workpiece.
5.2 Selecting the Correct Drill Bit
Selecting the right drill bit is crucial for precise and safe drilling. Choose a bit that matches the material (e.g., metal, wood, plastic) and the desired hole size. Twist bits are versatile for general use, while spade or forstner bits are ideal for larger or flat-bottom holes. Ensure the bit is sharp and free from damage to avoid vibration or breakage. Always refer to the manufacturer’s guidelines for recommended speeds and compatibility with your drill press. Proper bit selection enhances accuracy and prevents tool damage.
5.3 Adjusting Spindle Speed
Proper spindle speed adjustment is essential for efficient drilling. Select the correct speed based on the material and drill bit size. Higher speeds are suitable for smaller bits and harder materials, while lower speeds are better for larger bits and softer materials. Refer to the manufacturer’s guidelines for specific recommendations. Always change speeds with the machine turned off to avoid damage. Correct spindle speed ensures precise drilling, reduces wear on the tool, and prevents overheating or breakage of the bit. Adjustments should be made carefully to maintain optimal performance.
Maintenance and Service
Regular maintenance ensures optimal performance. Lubricate moving parts, clean debris, and inspect components. Address issues promptly to prevent wear and extend the drill press’s lifespan.
6.1 Regular Maintenance Tasks
Regular maintenance is crucial for optimal drill press performance. Lubricate moving parts, clean debris, and inspect belts and pulleys for wear. Check the spindle alignment and tighten any loose components. Replace worn or damaged parts promptly to prevent further issues. Ensure the chuck and arbor are clean and free of shavings. Store the drill press in a dry, clean environment when not in use. Follow the manufacturer’s recommendations for routine checks and servicing to extend the tool’s lifespan and maintain accuracy.
6.2 Lubrication and Cleaning
Regular lubrication ensures smooth operation and extends the drill press’s lifespan. Apply a few drops of machine oil to moving parts, such as bearings and gears, every 50 hours of use. Clean the spindle and chuck regularly to remove metal shavings and debris. Use a soft brush or cloth to wipe down surfaces. Avoid over-lubrication, as it may attract dust and dirt. Keep the work area clean to prevent contamination and ensure precise drilling results. Proper maintenance enhances tool longevity and performance.
6.3 Troubleshooting Common Issues
If the drill press vibrates excessively, check for loose belts or misaligned pulleys. For uneven drilling, ensure the workpiece is properly clamped and the drill bit is centered. If the spindle stalls, reduce the workload or lower the spindle speed. Regularly inspect and replace worn-out drill bits. Lubricate moving parts if they feel stiff. Always refer to the manual for specific troubleshooting steps to resolve issues efficiently and safely. Proper maintenance can prevent many common problems.

Advanced Techniques and Tips
Master precision drilling by using jigs and fixtures. Optimize spindle speed for material types. Regularly maintain the machine to ensure peak performance and extend its lifespan. Always follow safety guidelines for advanced operations. Proper tool alignment and accurate setup are key to achieving professional results. Experiment with different techniques to enhance your drilling accuracy and efficiency. Keep the workspace clean and well-organized for better workflow. Continuous learning and practice will help you unlock the full potential of your drill press. By implementing these tips, you can improve your overall drilling experience and produce high-quality work consistently. Ensure all safety precautions are in place before attempting complex tasks. Stay updated with the latest tools and methods to stay ahead in your projects. Remember, patience and attention to detail are crucial for mastering advanced techniques. Always refer to the manual for specific guidance on complex operations. This section is designed to help you take your skills to the next level, ensuring satisfaction with every project you undertake. With dedication and the right approach, you can achieve exceptional results with your drill press. Maintain a steady hand and focus on the task at hand for optimal outcomes. Following these advanced techniques and tips will elevate your craftsmanship.
7.1 Drilling Precision Holes
To achieve precise holes, use high-quality drill bits and ensure proper alignment. Secure the workpiece firmly and maintain consistent spindle speed. Employ jigs or fixtures for accuracy. Always measure twice before drilling. Keep the drill press well-lubricated for smooth operation. Avoid applying excessive force, as this can cause misalignment. Regularly inspect and replace worn-out bits to maintain precision. Proper clamping techniques prevent movement during drilling. For intricate projects, consider using pilot holes to guide the drill bit accurately. This ensures clean, professional results every time.
7.2 Using Jigs and Fixtures
Jigs and fixtures are essential for achieving consistent and precise results. A jig holds the workpiece in a fixed position, ensuring accurate drilling. Fixtures align the drill bit with pre-defined marks. Use custom-designed jigs for complex projects to maintain uniformity. Always secure the jig firmly to the drill press table. Pilot holes can guide the drill bit for exact placement. Regularly inspect jigs for wear and adjust as needed. Proper alignment prevents errors and enhances overall precision in your drilling tasks.
7.3 Optimizing Drill Press Performance
Optimize your drill press performance by ensuring proper maintenance and setup. Regularly clean and lubricate moving parts to prevent wear. Use the correct drill bit for the material being drilled to avoid damage. Align the spindle with the workpiece for accurate drilling. Adjust the spindle speed according to the drill bit size and material type. Properly secure the workpiece using clamps or vises to maintain stability. Store the drill press in a dry, clean environment to preserve its functionality and longevity. Always follow the manufacturer’s recommendations for optimal results.
8.1 Final Safety Reminders
Always wear protective gear like safety glasses and gloves. Ensure the workpiece is securely clamped to prevent movement. Avoid overreaching and keep loose clothing tied back. Never operate the drill press when fatigued or distracted. Regularly inspect the tool for damage or wear. Keep the workspace clean and well-lit. Follow all instructions in this manual and use the machine only for its intended purpose. Store the drill press in a dry, secure location out of children’s reach.
8.2 Encouragement for Further Learning
Congratulations on completing this manual! To further enhance your skills, explore advanced techniques and projects online. Refer to PDF guides and manufacturer resources for additional insights. Continuous learning will help you master your drill press and tackle complex tasks with confidence. Stay updated on new methods and tools to optimize your workshop experience. Happy crafting and drilling!
No Responses