
ShelterLogic 10×20 Shelter: A Comprehensive Assembly Guide
This guide provides detailed instructions for assembling your ShelterLogic 10×20 shelter (Model 31757 & similar).
It’s a temporary structure needing secure anchoring, offering protection from weather elements and debris.
The ShelterLogic 10×20 shelter is a versatile solution for storage and protection, crafted with quality materials designed to accommodate a custom fabric cover. This all-purpose canopy, specifically Model 31757, offers a robust framework against sun damage, light rain, tree sap, animal droppings, and even light snowfall.
However, it’s crucial to understand this is a temporary structure, not intended for permanent installation. Proper anchoring is paramount to ensure stability and prevent damage during inclement weather. This assembly guide will walk you through each step, emphasizing the importance of following the instructions completely. Remember to save your purchase receipt for warranty claims, as ShelterLogic, LLC provides a one-year warranty on the cover fabric, end panels, and framework.
Understanding the Shelter’s Purpose and Limitations
The ShelterLogic 10×20 shelter excels at providing temporary cover for various needs – storing equipment, sheltering vehicles, or creating a workspace. It’s designed to mitigate damage from environmental factors like sunlight, precipitation, and organic debris. However, recognizing its limitations is vital for safe and effective use.
This canopy is not a permanent structure and should not be treated as such. ShelterLogic explicitly states they are not responsible for shelters blown away due to improper installation or anchoring. Wind resistance is directly tied to secure fastening. Always prioritize proper anchoring based on the ground type. Ignoring these precautions could lead to structural failure and potential injury.
Furthermore, the warranty covers defects in materials, but doesn’t extend to damage caused by misuse or failure to follow assembly instructions.

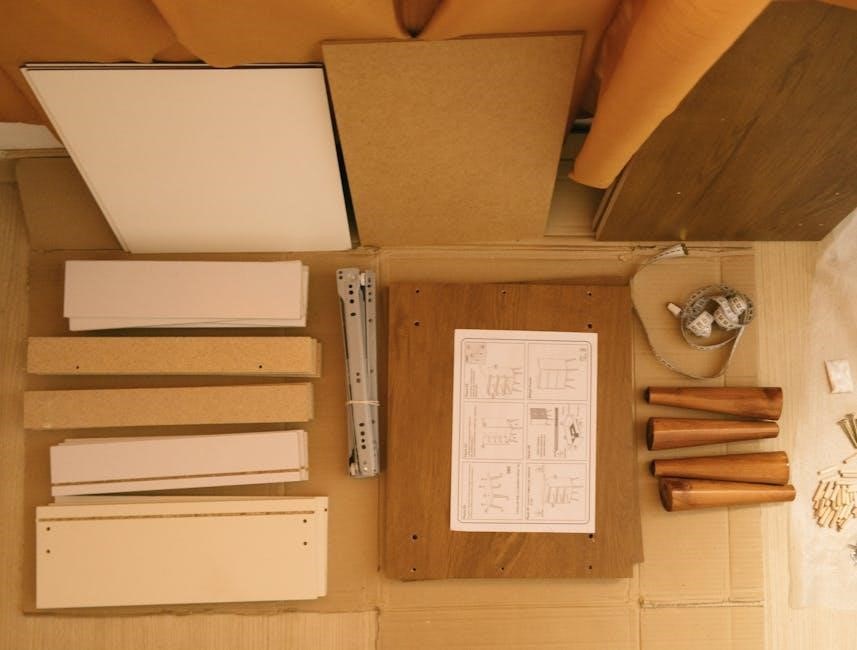
Parts Identification & Inventory

Carefully unpack and identify all components, referencing the detailed parts list. Key items include peak connectors, rafter poles, and upright poles, ensuring nothing is missing.

Detailed Parts List (Based on Model 31757 & Similar)
This comprehensive list details the components for your 10×20 ShelterLogic shelter, based on model 31757 and similar variations. You should find three 4-way peak connectors (Part 10201) and two 3-way peak connectors (Part 10202). Ten rafter poles (Part 10203) are essential for the roof structure, alongside ten upright poles (Part 10204). Additionally, there are upright pole and top cross rail sets (Part 10205).
Verify you have the correct quantity of each part before beginning assembly. Missing components can halt progress. This shelter is designed for use with a ShelterLogic custom fabric cover, sold separately. Remember to retain your purchase receipt for warranty claims, as the warranty period is determined from the date of shipment or purchase.
Identifying Key Components: Peak Connectors, Rafter Poles, Upright Poles
Peak connectors – the 4-way (10201) and 3-way (10202) – form the apex of the shelter’s frame, crucial for structural integrity. Rafter poles (10203) extend from these connectors, creating the sloping roofline. They are typically straight lengths of metal tubing. Upright poles (10204) provide vertical support, connecting the frame to the ground and ensuring stability.
Top cross rails (integrated with Upright Pole2 ౼ 10205) add further reinforcement to the upper frame. Correctly identifying these components is vital for a successful assembly. Ensure you differentiate between the various pole lengths and connector types. Refer to the parts list and diagrams in the assembly manual for visual clarification before proceeding with construction.
Checking for Missing or Damaged Parts
Before commencing assembly, meticulously inventory all components against the provided parts list. Verify the quantity of each item – peak connectors, rafter poles, upright poles, and any included hardware. Carefully inspect each part for damage, including bends, cracks, or corrosion. Damaged components compromise the shelter’s structural integrity and safety.
If any parts are missing or damaged, do not proceed with assembly. Contact ShelterLogic, LLC immediately to request replacements. Retain your proof of purchase (receipt) as it’s required for warranty claims. A complete and undamaged parts inventory ensures a smooth and secure assembly process, preventing potential issues later on. Prioritize safety and structural soundness.
Assembly Instructions: Step-by-Step
Follow these instructions carefully to build your ShelterLogic shelter. Begin by assembling the frame, connecting peak connectors, then attaching rafter and upright poles securely.
Step 1: Assembling the Frame ౼ Connecting Peak Connectors
Begin by laying out all frame components on a flat, protected surface. Identify the 4-way (10201) and 3-way (10202) peak connectors, referencing the parts list. Insert the rafter poles (10203) into the corresponding openings of the 4-way peak connector, ensuring a snug fit.
Next, attach the 3-way peak connectors to the ends of the rafter poles, forming the peak structure. Important: Ensure all connections are secure before proceeding. This initial frame assembly forms the backbone of the shelter, providing essential stability. Double-check that all poles are fully inserted into the connectors to prevent collapse during later stages.

Properly connected peak connectors are crucial for a structurally sound shelter. This step establishes the fundamental shape and integrity of the entire canopy system.
Step 2: Attaching Rafter Poles to Peak Connectors
With the peak connectors assembled, proceed to attach the remaining rafter poles (10203). Carefully insert each rafter pole into the open slots on the 4-way and 3-way peak connectors, ensuring a firm and secure connection. Pay attention to the alignment of the poles, maintaining consistent spacing along the shelter’s length.
This step builds upon the initial frame, extending the canopy’s structure. Verify that each rafter pole is fully seated within the connector to maximize stability and prevent slippage. A wobbly frame indicates improperly connected poles, requiring immediate adjustment.
Remember, a solid connection between the rafter poles and peak connectors is vital for withstanding wind and weather. Consistent and secure attachments are key to a durable shelter.
Step 3: Installing Upright Poles and Top Cross Rails
Now, install the upright poles (10204 & 10205) into the designated slots at the base of each peak connector. These poles provide vertical support, completing the frame’s structural integrity. Simultaneously, attach the top cross rails to the upright poles, further reinforcing the canopy’s shape and stability.
Ensure each upright pole is securely fastened, creating a level and balanced frame. The top cross rails connect the upright poles, distributing weight and preventing collapse. Double-check all connections for tightness and proper alignment.
Proper installation of these components is crucial for the shelter’s overall strength and ability to withstand external forces. A well-supported frame is essential before proceeding to the cover installation.
Securing and Anchoring the Shelter
Proper anchoring is vital for ShelterLogic shelters, preventing wind damage. Utilize recommended methods based on your ground type for maximum stability and safety.
Importance of Proper Anchoring
Secure anchoring is absolutely critical for the longevity and safety of your ShelterLogic 10×20 shelter. The structure is designed as a temporary solution and is vulnerable to wind damage if not properly secured. ShelterLogic explicitly states they cannot be responsible for shelters blown away due to inadequate anchoring.
Failing to anchor the shelter correctly can lead to structural failure, potentially causing damage to the shelter itself, surrounding property, and even injury. Anchoring ensures the shelter remains stable in various weather conditions, including moderate winds and light snow. Always prioritize a robust anchoring system tailored to the specific ground conditions where the shelter is installed. Remember, a well-anchored shelter provides reliable protection and peace of mind.
Recommended Anchoring Methods (Based on Ground Type)
For hard surfaces like concrete or asphalt, utilize heavy-duty concrete anchors or ballast weights. These provide a secure hold without penetrating the surface. On grassy or loamy soil, consider using ground stakes – spiral or auger-style stakes offer superior holding power compared to traditional straight stakes.
Sandy soil requires extra attention; longer, wider stakes or sand screws are recommended to achieve sufficient depth and grip. For gravel or rocky terrain, a combination of ground stakes and ratchet straps anchored to nearby solid objects may be necessary. Always consult the shelter’s manual for specific anchoring kit contents and usage guidelines. Proper anchoring is paramount for safety and shelter integrity, adapting to the ground’s unique characteristics.
Anchoring Kit Contents and Usage
Typically, a ShelterLogic 10×20 anchoring kit includes ground stakes, ratchet straps, and potentially concrete anchors depending on the kit’s variation. Ground stakes are driven into the soil at an angle, securing the shelter’s base rails. Ratchet straps are used to tighten and secure the shelter to the stakes, providing additional stability, especially in windy conditions.
Concrete anchors, for hard surfaces, require pre-drilled holes and are tightened to firmly attach the shelter. Ensure stakes are fully inserted and straps are taut. Regularly inspect the anchoring system for looseness or damage. Proper usage involves distributing anchors evenly around the shelter’s perimeter for balanced support. Refer to the manual for specific quantities and placement recommendations.

Warranty Information & Safety Precautions
ShelterLogic offers a one-year warranty on the cover fabric, end panels, and framework. This shelter is temporary; heed all safety warnings during assembly and use.
ShelterLogic Warranty Details (1 Year for Cover Fabric, Panels & Framework)
ShelterLogic, LLC provides a one-year warranty covering defects in the cover fabric, end panels, and the framework of your 10×20 shelter. The warranty period begins on the date of shipment for direct factory purchases or the date of purchase from an authorized reseller – please retain your receipt as proof of purchase.
This warranty ensures that if any component is found defective or missing upon receipt, ShelterLogic, LLC will, at its discretion, repair or replace the faulty part. This commitment to quality underscores our dedication to customer satisfaction. However, the warranty does not cover damage resulting from improper installation, failure to anchor the structure securely, or acts of nature beyond reasonable control.
For warranty claims, contact ShelterLogic, LLC directly with your proof of purchase and details of the defect.
Safety Warnings: Temporary Structure, Weather Considerations
Important Safety Notice: This ShelterLogic 10×20 shelter is engineered as a temporary structure and is not intended for permanent installation. Always prioritize safety during assembly and use. ShelterLogic cannot assume responsibility for shelters that are inadequately anchored or damaged by severe weather.
Exercise extreme caution during windy conditions or inclement weather. Disassemble the shelter or reinforce anchoring if strong winds are anticipated. Regularly inspect the frame and fabric for wear and tear. Ensure proper ventilation to prevent condensation buildup.
Never operate machinery or store flammable materials within the shelter. Keep the area around the shelter clear of obstructions. Failure to follow these safety guidelines could result in injury or property damage. Always read the complete assembly manual before use.
ShelterLogic, LLC explicitly disclaims all responsibility for damages, injuries, or losses resulting from improper installation, inadequate anchoring, or failure to follow the provided assembly instructions. The user assumes full responsibility for ensuring the shelter is securely erected and maintained.
Proper anchoring is critical for the stability and safety of this structure. ShelterLogic provides anchoring guidance, but the selection of appropriate anchoring methods is the user’s responsibility, based on local ground conditions.
Failure to adequately secure the shelter against wind, snow, or other environmental factors voids any warranty and releases ShelterLogic from any liability. Always prioritize safety and consult with a qualified professional if unsure about installation or anchoring procedures.
Maintenance and Care
Regularly clean the shelter fabric and inspect frame components for wear and tear to ensure longevity. Proper storage during off-season is also vital.
Cleaning the Shelter Fabric
Maintaining the fabric cover of your ShelterLogic 10×20 shelter is crucial for its lifespan and performance. Regular cleaning prevents the buildup of dirt, tree sap, bird droppings, and other debris that can degrade the material over time. For general cleaning, use a mild soap and water solution, applying it with a soft brush or cloth.
Avoid harsh chemicals, abrasive cleaners, or pressure washers, as these can damage the fabric’s coating and compromise its waterproof properties. Rinse thoroughly with clean water after washing, ensuring no soap residue remains. Allow the fabric to air dry completely before re-installing or storing it. Periodic cleaning, especially after exposure to harsh weather, will help preserve the shelter’s protective qualities and extend its usability.
Inspecting Frame Components for Wear and Tear
Regularly inspecting the metal frame of your ShelterLogic 10×20 shelter is vital for ensuring its structural integrity and preventing potential failures. Focus on connection points – peak connectors, joints, and where poles connect – looking for signs of rust, bending, or cracking. Examine the poles themselves for dents or corrosion, which can weaken them over time.
Pay close attention to the upright poles and top cross rails, as these bear significant weight. Tighten any loose bolts or screws, and replace any damaged components immediately. Addressing minor wear and tear promptly can prevent more significant issues and extend the shelter’s lifespan. Consistent inspection contributes to a safe and reliable structure.
Long-Term Storage Recommendations
When storing your ShelterLogic 10×20 shelter for extended periods, proper preparation is crucial to maintain its condition. Before storing, thoroughly clean the fabric cover to remove dirt, debris, and mildew, allowing it to completely dry. Disassemble the frame, carefully separating all components and checking for any damage incurred during use.
Store the frame pieces and fabric cover in a dry, well-ventilated location, protected from direct sunlight and extreme temperatures. Consider using a storage bag or tarp to shield the components from dust and moisture. Ensure the storage area is pest-free to prevent damage from rodents or insects. Proper storage will maximize the shelter’s longevity and ensure it’s ready for use when needed.
No Responses