Murray Push Mower Manual: A Comprehensive Guide
This comprehensive guide details Murray push mower operation, maintenance, and repair. It features illustrated parts lists, diagrams, and troubleshooting advice for various models, ensuring efficient lawn care.

Murray push mowers have a long-standing reputation for providing reliable and affordable lawn care solutions. This introduction sets the stage for understanding these machines, covering their historical context and common applications. Originally known for manufacturing bicycles, Murray transitioned to lawn and garden equipment, becoming a prominent name in the American landscaping scene.
These mowers are designed for homeowners with small to medium-sized yards, offering a practical alternative to more complex riding mowers. Murray push mowers typically feature a gasoline-powered engine, a cutting deck, and a handle for maneuverability. Understanding the basic components and their functions is crucial for effective operation and maintenance.
This manual aims to equip users with the knowledge to safely operate, maintain, and repair their Murray push mower, maximizing its lifespan and performance. From initial setup to troubleshooting common issues, this guide provides step-by-step instructions and detailed illustrations. Proper care ensures a beautifully manicured lawn for years to come.
Understanding Model Numbers and Manual Identification
Identifying your Murray push mower’s model number is the first step towards accessing the correct information for maintenance and repairs. The model number is typically located on a decal affixed to the mower’s deck, often near the engine or operator control area. It’s a unique identifier crucial for locating specific parts diagrams and manuals.
Murray utilizes a specific numbering system; for example, “20112X92e0” and “20112X92e1” denote distinct variations. Knowing this number allows you to accurately pinpoint the correct illustrated parts lists and engine breakdowns. Accessing the correct manual ensures you’re following procedures tailored to your specific mower.

Online resources, including the Briggs & Stratton website (often compatible with Murray engines), offer searchable databases. Inputting the model number will yield relevant documentation. Always verify the manual corresponds to your mower’s model year for the most accurate information. Proper identification prevents using incorrect parts or procedures, safeguarding both your mower and your safety.
Safety Precautions and Operating Instructions
Prioritizing safety is paramount when operating your Murray push mower. Always wear appropriate safety glasses and sturdy footwear. Never operate the mower with missing parts or altered safety features. Keep children and pets well clear of the mowing area.
Before each use, inspect the lawn for obstructions like stones, toys, or wires. Ensure the grass catcher is securely attached. When refueling, always shut off the engine and allow it to cool completely. Avoid spilling fuel and wipe up any spills immediately.
To start the mower, follow the manufacturer’s instructions precisely. Engage the blade only when the mower is in a safe, open area. Maintain a firm grip on the handle during operation. Never attempt to adjust the cutting height while the blade is spinning. After use, disengage the blade, shut off the engine, and disconnect the spark plug wire for added safety.
Assembly Instructions for New Murray Push Mowers
Unboxing and Initial Inspection: Carefully unpack your new Murray push mower, verifying all components are present against the parts list in your manual; Inspect for any shipping damage before proceeding.
Handle Assembly: Attach the handle to the mower deck using the provided bolts and washers. Ensure a secure and comfortable grip height before tightening. Connect any control cables, following the diagram in the manual.
Wheel Installation: Install the wheels onto the axle stubs, securing them with cotter pins or washers as specified. Verify the wheels rotate freely.
Grass Catcher Attachment: Attach the grass catcher frame to the mower deck. Ensure it clicks securely into place. Install the grass bag onto the frame.
Final Checks: Double-check all bolts and connections for tightness. Add oil and fuel according to the engine manufacturer’s instructions. Review the safety precautions before first use.
Engine Breakdown and Components
Engine Overview: Murray push mowers commonly utilize Briggs & Stratton engines. This section details key components for maintenance and repair. Familiarize yourself with these parts before undertaking any work.
Key Components: The engine comprises a cylinder, piston, connecting rod, crankshaft, camshaft, and valve train. The carburetor mixes air and fuel, while the ignition system initiates combustion.
Cooling System: Engines feature a cooling fan and fins to dissipate heat. Maintaining clean cooling fins is crucial for preventing overheating.
Lubrication System: Oil lubricates moving parts, reducing friction and wear. Regularly check and change the oil according to the engine manual’s schedule.
Fuel System: The fuel tank, fuel lines, and fuel filter deliver fuel to the carburetor. Inspect these components for leaks or blockages.
Governor: The governor regulates engine speed under varying loads. Proper governor function ensures consistent cutting performance.
Fuel System: Operation and Maintenance
Fuel Type: Murray push mowers typically require unleaded gasoline with an octane rating of 87 or higher. Always use fresh fuel and avoid ethanol blends exceeding 10% to prevent engine damage.
Fuel Tank: Ensure the fuel tank is clean and free of debris. Inspect the fuel cap for proper sealing to prevent fuel evaporation and spillage.
Fuel Lines: Regularly check fuel lines for cracks, leaks, or deterioration. Replace damaged fuel lines immediately to avoid fire hazards.
Fuel Filter: The fuel filter prevents contaminants from reaching the carburetor. Replace the fuel filter annually or as needed, depending on usage.
Carburetor: The carburetor mixes air and fuel for combustion. Clean the carburetor periodically to remove deposits and ensure optimal engine performance.
Fuel Shut-Off Valve: Utilize the fuel shut-off valve when storing the mower for extended periods to prevent fuel from gumming up the carburetor.
Blade Maintenance and Sharpening
Safety First: Always disconnect the spark plug wire before performing any blade maintenance to prevent accidental starting. Wear heavy gloves during handling.
Inspection: Regularly inspect the blade for dullness, nicks, bends, or cracks. A damaged blade can cause uneven cutting and potential hazards.
Sharpening: Sharpen the blade when it becomes dull to maintain optimal cutting performance. Use a metal file or a blade sharpening tool, maintaining the original angle.
Balancing: After sharpening, balance the blade using a blade balancer. An unbalanced blade can cause excessive vibration and damage to the mower.

Installation: Reinstall the blade securely, ensuring the curved edge faces the deck. Tighten the blade bolt to the manufacturer’s specified torque.
Frequency: Sharpen the blade at least once a season, or more frequently if mowing in sandy or abrasive conditions. Replace severely damaged blades immediately.

Deck Maintenance and Cleaning
Safety First: Disconnect the spark plug wire before any deck maintenance. Allow the engine to cool completely.
Cleaning: After each use, clean the underside of the deck to remove grass clippings and debris. This prevents rust and ensures efficient cutting.
Scraping: Use a scraper tool to remove stubborn buildup. Avoid using a pressure washer, as it can damage components.
Rust Prevention: Inspect the deck for rust. Remove any rust with a wire brush and apply a rust-inhibiting paint or coating.
Leveling: Ensure the deck is level for an even cut. Adjust the wheel height settings as needed.
Belt Inspection: While cleaning, inspect the deck belt for wear and tear. Replace if cracked or frayed.
Lubrication: Lubricate pivot points and moving parts on the deck to ensure smooth operation. Use a suitable lubricant.
Drive System Overview (If Applicable)
Self-Propelled Systems: Some Murray push mowers feature a self-propelled drive system, enhancing ease of use, particularly on inclines. This overview details its components.
Drive Belt: The drive belt transmits power from the engine to the wheels. Regularly inspect for wear, cracks, or looseness. Replacement is crucial for maintaining drive function.
Drive Cables: Control cables activate the self-propelled system. Ensure smooth operation and proper adjustment for responsive control.
Wheel Motors/Gears: Individual wheel motors or gearboxes provide power to each drive wheel. Lubricate according to the maintenance schedule.
Speed Control: Variable speed control allows adjusting mowing pace. Ensure the control lever operates smoothly and engages/disengages correctly.
Disengagement Clutch: A clutch disengages the drive system for easy maneuvering and transport. Verify proper engagement and disengagement.
Maintenance: Regularly clean the drive system components and lubricate moving parts to prolong lifespan and ensure optimal performance.
Troubleshooting Common Issues
Mower Won’t Start: Check fuel levels, spark plug connection, and ensure the safety bail is engaged. A clogged air filter or faulty ignition switch can also be culprits.
Engine Stalls: Dirty carburetor, restricted fuel flow, or a worn spark plug often cause stalling. Clean or replace these components as needed.
Uneven Cut: Dull or damaged blades, uneven deck height, or excessive grass buildup contribute to an uneven cut. Sharpen or replace blades and adjust deck height.
Excessive Vibration: Loose bolts, unbalanced blade, or engine issues can cause vibration. Tighten bolts, balance the blade, and inspect the engine.
Smoke Emission: Blue smoke indicates oil burning; white smoke suggests coolant leakage. Address these issues promptly to prevent engine damage.
Drive System Issues: Slipping drive belt, faulty drive cables, or damaged wheel motors can affect self-propulsion. Inspect and replace worn components.
Always consult the full manual for detailed troubleshooting steps and safety precautions before attempting any repairs.
Starting Problems: Diagnosis and Solutions
No Crank: Verify the spark plug wire is securely connected. Check the safety bail – it must be fully engaged. A faulty safety switch is a common issue.
Engine Cranks But Doesn’t Start: This often indicates a fuel delivery problem. Inspect the fuel line for kinks or blockages. A clogged carburetor is a frequent cause; cleaning is often required.
Weak Spark: A fouled or worn spark plug will produce a weak spark. Replace the spark plug with a new one of the correct type.
Flooded Engine: Excessive priming or repeated starting attempts can flood the engine. Allow the spark plug to dry, and avoid further priming.
Old Fuel: Stale fuel loses its combustibility. Drain the old fuel and replace it with fresh gasoline.
Choke Issues: Ensure the choke is functioning correctly, opening and closing as needed. A stuck choke can prevent starting.
Refer to your specific model’s manual for detailed diagrams and troubleshooting steps. Always disconnect the spark plug wire before performing any maintenance.
Cutting Issues: Addressing Uneven Cuts
Uneven Cut – Scalping: This often results from cutting the grass too short. Adjust the cutting height to a higher setting. Ensure the mower deck is level; an uneven deck causes scalping.
Uneven Cut – Streaking: Dull or damaged blades create streaking. Sharpen or replace the blades. Check blade balance – unbalanced blades vibrate and cut unevenly.
Grass Clippings Clumping: Cutting wet grass or attempting to cut too much grass at once leads to clumping. Raise the cutting height and mow more frequently.
Deck Obstructions: Debris buildup under the deck interferes with airflow and cutting performance. Regularly clean the underside of the deck.
Tire Pressure: Unequal tire pressure causes an uneven deck height. Check and adjust tire pressure to the manufacturer’s specifications.
Blade Installation: Incorrect blade installation can cause imbalance and poor cutting. Ensure blades are installed correctly, with the cutting edges facing the right direction.
Consult your model’s manual for specific blade specifications and deck leveling instructions. Safety first – disconnect the spark plug before inspecting the blades.
Engine Overheating: Causes and Prevention

Insufficient Cooling Air: A clogged cooling fan or obstructed airflow around the engine causes overheating. Regularly clean the cooling fins and ensure clear ventilation.
Low Oil Level: Insufficient lubrication increases friction and heat. Check the oil level before each use and maintain the recommended level.
Dirty Air Filter: A clogged air filter restricts airflow to the engine, leading to a rich fuel mixture and increased heat. Replace or clean the air filter regularly.

Incorrect Fuel Mixture: Using the wrong fuel or an improper fuel-to-oil ratio (for 2-stroke engines) can cause overheating. Use the fuel specified in the manual.
Overloading the Engine: Cutting excessively tall or thick grass strains the engine. Raise the cutting height or mow in multiple passes.
Carbon Buildup: Carbon deposits in the combustion chamber reduce efficiency and increase heat. Consider using a fuel stabilizer/cleaner.
Always allow the engine to cool before refueling. Refer to your engine’s manual (often Briggs & Stratton) for specific overheating prevention measures.
Parts Diagrams: Locating Specific Components
Accessing Parts Diagrams is crucial for repairs and maintenance. Murray utilizes detailed exploded views illustrating each component’s location. These diagrams are essential for identifying the correct part numbers.
Model-Specific Diagrams: Always use the diagram corresponding to your mower’s exact model number (e.g., 20112X92e0, 20112X92e1). Incorrect diagrams lead to incorrect parts.

Online Resources: Many online resources provide Murray parts diagrams. Search using your model number to find interactive diagrams and parts lists.
Manuals: Original Murray manuals often include parts diagrams. If you have the manual, it’s the most reliable source.

Key Components Illustrated: Diagrams typically show engine parts, deck components, wheels, handles, and control systems.
Understanding Diagram Notation: Familiarize yourself with the diagram’s key, which explains symbols and numbering conventions.
Utilize the 3667 model diagram as a reference for deck parts. Accurate identification ensures successful repairs and extends your mower’s lifespan.
Handles and Control Systems: Parts and Repair
The handle and control systems are vital for safe and comfortable operation. Common issues include broken handles, malfunctioning control cables, and worn-out operator presence switches.
Key Components: These systems encompass the mower handles, control levers (speed, blade engagement), operator presence (OP) switches, and associated cabling.
Handle Repair/Replacement: Cracked or broken handles should be replaced immediately. Parts diagrams (referencing model-specific lists) aid in identifying the correct handle assembly.
Control Cable Adjustment/Replacement: If controls feel loose or unresponsive, adjust or replace the control cables. Ensure proper routing and tension.
Operator Presence Switch: A faulty OP switch prevents the engine from running when the handle is released – a critical safety feature. Test and replace if necessary.
Parts Lookup: Utilize online parts finders with your mower’s model number to locate specific handle and control system components.
Safety First: Disconnect the spark plug before performing any repairs on the control system to prevent accidental starting.
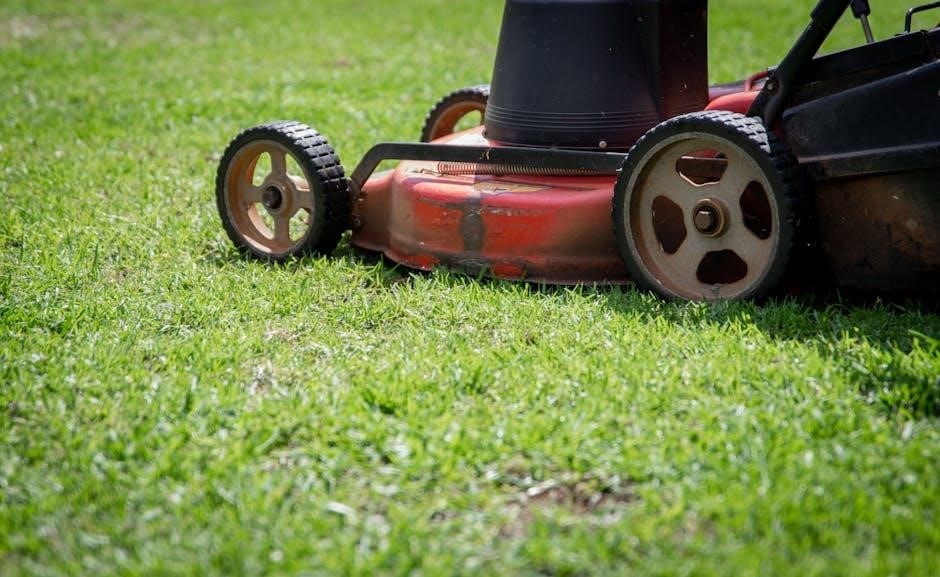
Murray Mower Deck Parts Diagram (Model 3667 Example)
The Model 3667 deck diagram illustrates the arrangement of components within the cutting deck, crucial for maintenance and repair. This 11 hp model’s blade housing contains 81 distinct parts, each with a specific function.
Key Components Illustrated: The diagram details the blade, blade adapter, deck shell, side discharge chute, anti-scalp wheels, and various mounting bolts and washers.
Understanding the Diagram: Part numbers are clearly labeled, corresponding to parts lists for easy identification and ordering. Exploded views showcase how components assemble.
Common Replacement Parts: Frequently replaced items include the blade, blade adapter, and anti-scalp wheels, due to wear and tear from regular mowing.
Locating Parts: Use the diagram in conjunction with online parts finders, entering the model number (3667) to pinpoint the exact part needed.
Safety Note: Always disconnect the spark plug before working on the mower deck to prevent accidental starting and potential injury.
Detailed Views: Zooming into the diagram provides a closer look at specific areas, aiding in accurate part identification and assembly.
Illustrated Parts Lists: Accessing Online Resources
Accessing Murray illustrated parts lists online streamlines the process of identifying and ordering replacement components for your push mower. Several resources offer comprehensive diagrams and parts information.

Murray’s Official Website: While direct access may vary, searching for your mower’s model number often leads to downloadable parts manuals or interactive diagrams.
Third-Party Parts Retailers: Websites specializing in lawn mower parts, like Partstree.com, frequently host Murray parts lists and diagrams, searchable by model number.
Briggs & Stratton’s Website: Given Murray’s frequent use of Briggs & Stratton engines, their site can provide engine-specific parts breakdowns.
YouTube Tutorials: Numerous videos demonstrate how to locate and interpret Murray parts diagrams, offering visual guidance.
Model Number is Key: Always have your mower’s complete model number (e.g., 20112X92e0) readily available for accurate searches.
Digital vs. Print: Digital lists are searchable and readily available, while print manuals offer offline access and portability.
20112X92e0 & 20112X92e1 Parts List Details
The 20112X92e0 and 20112X92e1 models share significant parts commonality, simplifying maintenance and repair. These lists detail components for walk-behind Murray mowers, often including engine breakdowns.
Key Components Covered: Lists typically include diagrams and part numbers for the deck, wheels, handles, engine components (carburetor, muffler, starter), and blade assembly.
Engine Breakdown Specifics: Detailed engine breakdowns showcase parts like pistons, connecting rods, crankshafts, and cylinder heads, crucial for engine repairs.
Handle & Control Systems: Parts lists outline handle grips, control cables, and operator presence switches, ensuring safe operation.
Deck Assembly: Diagrams illustrate the deck’s structure, including the blade, spindle, and various mounting hardware.
Finding the Right Part: Utilizing the model number and parts list is vital for ordering the correct replacement components, preventing compatibility issues.
Online Resources: These parts lists are frequently available on parts retailer websites and through Murray’s support channels.
Briggs & Stratton Engine Manuals (Murray Compatibility)
Murray frequently utilized Briggs & Stratton engines in their push mowers, making Briggs & Stratton manuals invaluable for repair and maintenance. Compatibility is extensive across numerous Murray models.
Accessing Manuals: Briggs & Stratton provides a comprehensive online database of engine manuals, searchable by engine model number – typically found on the engine’s label.
Manual Contents: These manuals detail engine specifications, maintenance schedules (oil changes, spark plug replacement), troubleshooting guides, and exploded parts diagrams.
Key Repair Information: Briggs & Stratton manuals cover carburetor adjustments, ignition system repairs, and valve adjustments – common maintenance tasks.
Safety Precautions: Always consult the manual for specific safety warnings and procedures before performing any engine work.
Finding Your Engine Model: Locate the engine’s model, type, and code to ensure you download the correct manual.
Supplemental Resources: Briggs & Stratton’s website also offers helpful videos and FAQs to assist with repairs.
Aftersales Support and Parts Lookup (UK Models)
For UK Murray push mower owners, dedicated aftersales support and parts lookup services are crucial for maintaining your machine. Leigh Park Garden Machinery is a prominent resource, specializing in Murray ride-on and push mower spare parts.
Parts Availability: They offer extensive parts lists and diagrams, facilitating accurate component identification for UK models. This includes blades, belts, wheels, and engine parts.
Online Lookup Tools: Utilize online parts lookup tools, often requiring your mower’s model number, to pinpoint the exact parts needed. Model numbers are typically located on the mower’s deck.
Expert Assistance: Contacting specialist retailers like Leigh Park Garden Machinery provides access to knowledgeable staff who can assist with parts selection and troubleshooting.
Genuine Parts: Prioritize genuine Murray or compatible parts to ensure optimal performance and longevity of your mower.
Warranty Support: Check if your mower is still under warranty and understand the warranty terms for potential repairs or replacements.
Local Repair Services: Consider utilizing local lawn mower repair services for complex repairs or maintenance tasks.
No Responses